If you’ve ever wondered how to effectively and efficiently secure shingles on your roof, then using a power roofing nailer might just be the answer you’re looking for. This handy tool can make the process of securing shingles quick and simple, saving you time and effort. In this article, we will guide you through the step-by-step process of using a power roofing nailer, ensuring that you achieve a secure and durable roof. So, let’s get started and make roofing a breeze!

Choosing the Right Power Roofing Nailer
When it comes to choosing the right power roofing nailer, there are a few factors to consider. First and foremost, you need to take into account the weight and size of the nailer. Since you’ll be using it for an extended period of time, it’s important to choose a nailer that is comfortable to handle. You don’t want something too heavy that will strain your arms or wrists. Similarly, the size of the nailer should be appropriate for your needs. A compact and lightweight nailer would be easier to maneuver and handle.
In addition to weight and size, adjustable depth settings are another crucial feature to look for in a power roofing nailer. Different roofing projects might require different nail depths, and having the ability to adjust the depth settings allows for more versatility. This feature ensures that your nails are driven to the correct depth for optimal results.
Lastly, opting for a nailer with a coil magazine can greatly enhance your efficiency. A coil magazine allows for a larger number of nails to be held, reducing the frequency of reloading. This means you can work continuously for longer periods of time without interruptions, increasing productivity. Considering these factors will help you choose the right power roofing nailer for your specific needs.
Preparing the Roofing Nailer
Before using your roofing nailer, it’s important to inspect it for any damage or defects. Check for any loose or missing parts, and ensure that all the components are in good working condition. If you notice any issues, it’s advisable to get them fixed or replace the nailer entirely.
Once you’ve inspected the nailer and confirmed that it’s in good shape, the next step is to clean and lubricate it. Over time, debris and dirt can accumulate in the tool, affecting its performance. Cleaning the nailer ensures that it operates smoothly and minimizes the risk of jams or malfunctions. Additionally, lubricating the moving parts helps reduce friction, prolonging the lifespan of the tool.
By taking the time to prepare and maintain your roofing nailer, you can ensure it functions optimally and delivers excellent results throughout your project.
Selecting the Right Size and Type of Roofing Nails
Choosing the correct size and type of roofing nails is crucial for the secure installation of shingles. When it comes to nail length, it’s important to select nails that are appropriate for your project. The length should be sufficient to penetrate through the shingle, the roofing material, and into the underlying surface, providing a secure hold. Consult the manufacturer’s guidelines or seek advice from professionals to determine the ideal nail length for your specific roofing system.
Equally important is selecting the right type of nails for the shingles being used. Different materials require different types of nails to ensure proper attachment. For example, asphalt shingles typically require galvanized nails to prevent rusting, while other materials like cedar or metal may have their own specific nail requirements. It’s crucial to choose nails that are compatible with the shingle material in order to achieve a secure and long-lasting roof.
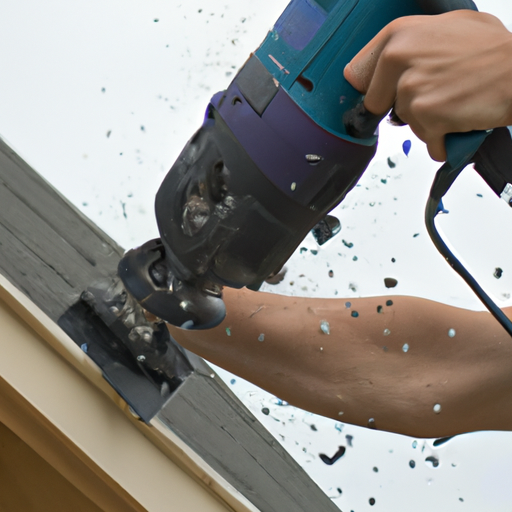
Positioning and Handling the Nailer
Proper positioning and handling of the nailer are essential for accurate and efficient shingle installation. To begin, hold the nailer at a comfortable angle that allows you to have a clear line of sight and access to the surface you’re working on. This ensures that you can position the nail accurately and avoid any potential mistakes or misfires.
Maintaining a firm grip on the handle is equally important. A loose grip can lead to mishaps or the nailer slipping from your hand. As a result, it’s always a good practice to hold the nailer securely to maintain control and stability.
Additionally, keeping your fingers away from the trigger is vital to prevent accidental discharge of nails. Before pulling the trigger, ensure that the nailer is correctly positioned and aligned with the desired nail placement. This will help avoid any unnecessary damage or injuries.
By following these guidelines, you can effectively position and handle your power roofing nailer for optimal performance and safety.
Starting with the First Shingle Row
As you begin your roofing project, it’s important to start with the first shingle row at the lower edge of the roof. This ensures that subsequent rows will overlap properly, providing maximum protection against leaks. Take your time to position the first shingle row accurately before securing it in place.
Proper alignment is crucial for the success of your roofing project. Ensure that each shingle is correctly positioned and aligned with the edges of the roof and adjacent shingles. This will give your roof a neat and professional appearance while also ensuring a tight seal to prevent water penetration.
Once the shingle is in position, it’s time to insert the appropriate nails in the designated places. Refer to the manufacturer’s instructions or industry guidelines to determine the recommended nail placement for the specific shingle type you’re using. Secure the shingle with the recommended number of nails, usually ranging from 4-6 per shingle, to provide sufficient stability.
By starting with the first shingle row and paying attention to alignment and secure fastening, you’ll set a solid foundation for a successful roofing project.
Securing Shingles in Subsequent Rows
After the initial row is securely in place, it’s time to move on to the subsequent rows. Each new row of shingles should overlap the previous row, ensuring proper water drainage and preventing leaks. Be mindful of the recommended overlap distance specified by the shingle manufacturer or industry standards.
Just like with the first row, proper alignment is key. Ensure that each shingle in the subsequent rows lines up with the edges of the roof and the adjacent shingles. This will create a uniform and visually appealing roof, while also providing a secure seal against the elements.
When securing each shingle in the subsequent rows, it’s important to use the appropriate number of nails for each shingle. This typically ranges from 4-6 nails, depending on the size and type of shingle. Following the recommended guidelines for nail placement and quantity will ensure that your shingles are properly secured and resistant to wind uplift.
By following these steps, you can effectively secure shingles in subsequent rows, creating a sturdy and visually appealing roof.
Navigating Roof Obstacles and Difficult Areas
During the roofing process, you may encounter various obstacles or difficult areas that require special attention. One common challenge is dealing with roof obstacles such as chimneys, vents, or skylights. In these situations, it may be necessary to trim or cut the shingles to fit around these objects properly.
Take your time to carefully measure and mark the shingles before making any cuts. Use appropriate tools, such as a utility knife or tin snips, to achieve clean and precise cuts. Ensuring that the shingles fit seamlessly around the obstacle will maintain the integrity of the roof while also providing a visually pleasing result.
In tight spaces or corners where the power roofing nailer may not be easily maneuverable, it’s advisable to use a hand nailer. Hand nailers provide greater control and maneuverability in such situations, allowing for accurate nail placement and secure attachment of the shingles. This ensures that even the most challenging areas of the roof are properly taken care of.
By effectively navigating roof obstacles and difficult areas, you can ensure a seamless and professional finish to your roofing project.
Maintaining a Consistent Nailing Pattern
Maintaining a consistent nailing pattern throughout the roof is essential for both aesthetics and functionality. A consistent pattern creates a visually pleasing result, giving the roof a professional and uniform appearance.
To achieve a consistent nailing pattern, it’s important to follow a predetermined system or template. This can be as simple as using a chalk line to mark reference points for nail placement. Additionally, spacing out the nails evenly and avoiding skipped nails or placing them too closely together helps ensure that the shingles are properly secured and resistant to wind uplift.
Taking the time to establish and maintain a consistent nailing pattern will result in a roof that not only looks great but also performs well against the elements.

Checking and Adjusting Nail Depth
Regularly checking the depth of the nails is crucial for ensuring proper installation of the shingles. Throughout the roofing process, it’s important to periodically inspect the depth of the nails to ensure that they are driven to the correct depth.
Checking the nail depth can be done by examining the indentation left by the nail head on the shingle surface. If the nail is not driven deep enough, it may not provide sufficient hold. On the other hand, nails driven too deep can damage the shingle or even penetrate through the roof deck, compromising the integrity of the roof.
If necessary, make adjustments to the nail depth settings on your power roofing nailer. This will allow you to fine-tune the depth to ensure the nails are properly seated without causing any damage. By regularly checking and adjusting the nail depth, you can ensure a secure and long-lasting roof.
Finishing the Roofing Project
Once you’ve completed the shingle installation, there are a few final steps to take to finish your roofing project. First, trim any excess overhanging shingles to achieve a clean and polished look. Using appropriate tools, carefully trim along the roof edge to remove any excess material.
Next, take the time to clean up the work area of any debris or waste materials. A clean work area not only improves the overall appearance of the finished roof but also ensures the safety of anyone accessing the area.
Finally, it’s important to thoroughly inspect the roof for any missed or loose nails. Walk around the roof and visually inspect each shingle for any signs of loose or improperly secured nails. If any issues are found, address them immediately to prevent future problems such as leaks or shingle damage.
By completing these final steps, you can confidently wrap up your roofing project, knowing that your hard work has resulted in a secure and visually appealing roof.
In conclusion, using a power roofing nailer for securing shingles requires careful consideration of various factors. Choosing the right nailer, preparing and maintaining it properly, selecting the appropriate nails, and following correct positioning and handling techniques are all crucial for successful shingle installation. By following a consistent nailing pattern, checking and adjusting nail depth as needed, and finishing the project with attention to detail, you can achieve a secure and visually appealing roof that will stand the test of time. Happy roofing!
